How to Care for a Peace Lily: Easy Steps to Help It Flourish Indoors!
Share
Table of Contents
1. Introduction
The peace lily (Spathiphyllum) is one of the most popular indoor plants, known for its elegance, ease of care, and air-purifying qualities. With its glossy, dark green leaves and striking white blooms, it adds a touch of beauty to any room while being relatively low-maintenance. Whether you're a seasoned plant enthusiast or a beginner, the peace lily is a perfect choice for bringing nature indoors.
- Beautiful foliage: Peace lilies feature lush, dark green leaves that complement any interior décor, and their white spathes (flower-like structures) are a stunning addition.
- Easy to care for: This hardy plant thrives with minimal attention, making it ideal for those who want to enjoy the benefits of indoor plants without extensive gardening knowledge.
- Air-purifying properties: Peace lilies are known for their ability to filter indoor air, removing toxins such as ammonia, benzene, and formaldehyde. They can improve indoor air quality, making them a great choice for bedrooms and living spaces.
Despite their reputation for being easy to grow, peace lilies require specific care to thrive. In this guide, we will walk you through the essential steps to ensure your peace lily remains healthy and vibrant. From understanding the right lighting conditions to learning the best watering and fertilizing techniques, here are the steps that will help your peace lily flourish:
- Optimal Light Conditions: Discover the ideal amount of light your peace lily needs to grow strong and bloom.
- Proper Watering Techniques: Learn how to balance watering to avoid root rot and ensure your plant stays hydrated.
- Fertilizing and Nutrient Needs: Explore how to nourish your peace lily for optimal growth.
- Common Problems and Troubleshooting: Understand how to address issues such as yellowing leaves or brown tips.
- Repotting and Propagation: Learn when and how to repot your peace lily for continued growth and how to propagate it for new plants.
By following these steps, you'll be able to cultivate a thriving, beautiful peace lily that can brighten up your space while purifying the air around you.

2. Understanding the Peace Lily: What You Need to Know
The peace lily (Spathiphyllum) is native to the tropical regions of Central and South America, where it thrives in the shaded understory of rainforests. In its natural habitat, it grows on the forest floor, typically near streams and rivers, which explains its preference for humidity and indirect light. This natural environment shapes many of the peace lily’s care requirements, making it ideal for indoor living conditions.
- Natural Habitat: Native to tropical rainforests, peace lilies enjoy high humidity, consistent moisture, and shaded areas with filtered light.
- Care Requirements: Peace lilies need well-draining soil and a consistent watering schedule, as they dislike being over-watered or sitting in stagnant water.
- Light Needs: While they prefer indirect light, peace lilies can adapt to lower light levels, though they may produce fewer blooms under these conditions.
Peace lilies are known for their unique and striking appearance. They feature glossy, dark green leaves that provide a lush backdrop for their famous white spathes (modified leaves) and spiky yellow flowers. These blooms are actually a type of bract that surrounds the tiny yellow flowers, giving them a delicate, elegant appearance.
- Growth Habits: Peace lilies are relatively compact plants that grow to about 1 to 4 feet tall, depending on the variety and growing conditions.
- Unique Features: The white blooms contrast beautifully with their deep green foliage, making them a stunning addition to any indoor space.
- Adaptability: One of the peace lily’s standout features is its adaptability. It can thrive in low-light environments and doesn’t require frequent watering, making it perfect for apartments and homes with less-than-ideal lighting conditions.
3. Ideal Growing Conditions for Peace Lilies
To ensure your peace lily thrives and blooms beautifully, it’s crucial to provide the ideal growing conditions. Peace lilies are relatively low-maintenance, but like all plants, they have specific needs when it comes to light, temperature, humidity, and soil. Understanding these requirements will help you create the perfect environment for your plant.
3.1 Light Requirements
Peace lilies prefer bright, indirect light, which mimics their natural rainforest habitat where they receive filtered sunlight through the canopy. Providing the right lighting is essential for healthy growth and blooming.
- Bright, Indirect Light: Place your peace lily near a window with sheer curtains or in a room with filtered light. Avoid direct sunlight, which can scorch the leaves.
- Choosing the Right Location: A north- or east-facing window is ideal. If this isn’t possible, you can place your plant a few feet away from a south- or west-facing window, where the light is not as intense.
- Effects of Direct Sunlight: If exposed to direct sunlight, the plant may develop brown spots on the leaves and the foliage can become scorched. On the other hand, insufficient light can result in slow growth, yellowing leaves, and a lack of blooms.
3.2 Temperature and Humidity
Peace lilies thrive in a warm, humid environment, which is similar to their native tropical rainforest conditions. Maintaining the right temperature and humidity levels is essential for optimal growth.
- Ideal Temperature Range: Peace lilies grow best in temperatures between 65–80°F (18–27°C). They can tolerate slightly cooler temperatures, but they should never be exposed to drafts or cold air.
- Humidity Needs: Being tropical plants, peace lilies prefer high humidity. If your home is dry, especially during winter, you can increase humidity by placing a humidifier nearby, grouping plants together, or using a pebble tray with water.
- Signs of Stress: If the temperature or humidity levels are too high or low, you may notice the plant’s leaves turning yellow or brown. Additionally, if the air is too dry, leaf tips may start to brown.
3.3 Soil and Potting
Choosing the right soil and pot for your peace lily is vital for healthy growth. A well-draining potting mix and the proper pot size will ensure your plant’s roots are well-supported and not waterlogged.
- Potting Mix: Use a light, well-draining potting mix that retains moisture without becoming soggy. A peat-based mix or a mix designed for tropical plants works well. Ensure the soil has a slightly acidic to neutral pH (6.0–7.0).
- Re-potting: Peace lilies should be re-potted every 1-2 years to refresh the soil and give the plant more space to grow. Choose a pot that’s 1-2 inches larger than the current one, with drainage holes to prevent water from accumulating at the bottom.

4. Watering Your Peace Lily
Watering is one of the most important aspects of caring for your peace lily. While this plant enjoys consistent moisture, it’s crucial to find a balance—too little water can lead to wilting, while over-watering can cause root rot. Here’s how to ensure your peace lily receives just the right amount of water for optimal health.
4.1 Watering Schedule
Peace lilies typically prefer to be watered once a week, but the frequency can vary depending on the environment and the plant’s size. It’s important to monitor the moisture level in the soil to avoid over- or underwatering.
- When and How Often to Water: Water your peace lily when the top 1-2 inches of soil feel dry to the touch. During the warmer months, you may need to water more often, whereas in cooler months, the plant’s water needs may decrease.
- How to Check When It Needs Water: Stick your finger into the soil up to about an inch deep. If it feels dry, it’s time to water. If it feels moist, wait another few days before checking again.
4.2 Watering Tips
Using the right watering techniques will keep your peace lily healthy. Here are some helpful tips for proper watering:
- Use Room-Temperature Water: Cold water can shock the roots, so always use room-temperature water for peace lilies. Avoid using hot water, as it can harm the plant.
- Avoiding Over-Watering and Under-Watering: Peace lilies dislike sitting in water, so make sure the pot has drainage holes. Ensure that you water enough to moisten the soil but not so much that it becomes soggy.
- Signs of Over-Watering: Over-watered peace lilies often show yellowing leaves or leaves that turn soft and mushy. To prevent this, ensure the pot drains well and that the soil is not constantly wet.
- Signs of Under-Watering: If your peace lily is underwatered, the leaves will droop and become limp. If you see these signs, water the plant immediately, but avoid overcompensating by flooding it.
4.3 Special Watering Needs
Peace lilies have a few special watering considerations that can impact their health.
- Impact of Tap Water Quality: Tap water that contains chlorine or fluoride can harm peace lilies over time. If possible, use filtered or distilled water to avoid exposing the plant to these chemicals.
- Watering During Different Seasons: During warmer months, peace lilies need more frequent watering due to higher evaporation rates. In cooler months, you can reduce the frequency of watering, as the plant’s growth slows down.
5. Fertilizing Your Peace Lily
Fertilizing your peace lily helps to maintain healthy growth, vibrant leaves, and more frequent blooms. However, it’s essential to choose the right type of fertilizer and apply it at the correct intervals to avoid harming your plant. Let’s explore how to fertilize your peace lily properly.
5.1 Choosing the Right Fertilizer
To ensure that your peace lily receives the necessary nutrients for growth, it's important to choose a fertilizer with the correct nutrient composition.
- Balanced, Water-Soluble Fertilizer: Look for a fertilizer with a balanced NPK ratio (e.g., 20-20-20) that provides equal amounts of nitrogen (N), phosphorus (P), and potassium (K). This ensures the plant gets the nutrients it needs for overall growth and flowering.
- Organic vs. Synthetic Options: Both organic and synthetic fertilizers can work well for peace lilies. Organic fertilizers, such as compost or fish emulsion, release nutrients slowly and improve soil health, while synthetic fertilizers provide faster results but may need more frequent application. Choose based on your preference for natural or quick results.
5.2 Fertilizing Schedule
Knowing when to fertilize your peace lily can help it thrive and produce beautiful blooms. The right fertilizing schedule depends on the plant's growth cycle.
- Spring and Summer: During the active growing season (spring and summer), fertilize your peace lily every 4-6 weeks. This is when the plant is growing and blooming, so it needs more nutrients.
- Fall and Winter: In fall and winter, when growth slows down, reduce fertilizing to once every 8-10 weeks. Too much fertilizer during this time can cause nutrient imbalances and harm the plant.
- Adjusting Based on Plant Health: If your peace lily shows signs of poor growth or yellowing leaves, it may need more fertilizer. Conversely, if the plant’s growth seems excessive and leggy, cut back on the fertilizer to avoid overfeeding.
5.3 Signs of Over-Fertilizing
Over-fertilizing can cause significant damage to your peace lily, leading to burnt or discolored leaves.
- Signs of Over-Fertilizing: If you notice brown tips on the leaves, yellowing, or leaf burn, this is likely a result of over-fertilizing. It’s important to flush the soil with water to remove excess fertilizer and stop fertilizing for a while.

6. Pruning and Maintenance
Pruning and maintaining your peace lily are essential for keeping it healthy, attractive, and blooming consistently. Regular care ensures the plant stays lush and vibrant while also encouraging new growth. Let’s dive into the best techniques for pruning and leaf maintenance.
6.1 Pruning Techniques
Pruning helps your peace lily maintain its shape and health. Here are the main techniques to follow:
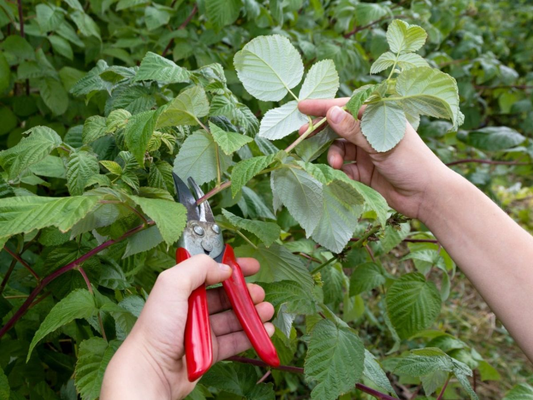
- Pruning Yellow or Dead Leaves: Remove yellowing or dead leaves as soon as you notice them. This prevents the plant from directing energy to unhealthy foliage and allows it to focus on healthier growth. Use sharp, clean scissors or pruning shears to cut the leaves near the base, where they meet the stem.
- Cutting Back Spent Flowers: After the white blooms have faded, prune them back to encourage new flowering. Use clean, sharp scissors to cut the spent flowers near their base. This also helps the plant maintain a tidy appearance and promotes the growth of fresh blooms.
6.2 Leaf Cleaning and Dusting
Regular leaf cleaning helps your peace lily stay healthy and ensures it can absorb as much light as possible. Here’s how to properly care for its glossy leaves:
- How to Clean the Large, Glossy Leaves: Use a soft, damp cloth to gently wipe the leaves. Avoid harsh chemicals or cleaning agents, as they can damage the surface. If your plant has very dusty leaves, you can also lightly spray the leaves with water and then wipe them clean.
- Importance of Keeping Leaves Free from Dust: Dust can block sunlight from reaching the leaves, inhibiting photosynthesis and slowing the plant’s growth. Regular dusting ensures the plant can efficiently absorb light and nutrients, helping it remain healthy and vibrant.
7. Common Problems and How to Fix Them
Even with the best care, your peace lily may face some common problems. Understanding these issues and knowing how to fix them will help you maintain a healthy and thriving plant. Below, we’ll go through the most common problems and solutions.
7.1 Yellowing Leaves
Yellowing leaves are a common issue for peace lilies, and there are several potential causes for this symptom:
-
Causes:
- Over-watering: Constantly soggy soil can cause root rot, leading to yellowing leaves.
- Nutrient Deficiencies: Lack of essential nutrients like nitrogen can cause leaves to turn yellow.
- Poor Light Conditions: If your peace lily is not getting enough light, its leaves may yellow as a sign of stress.
-
Solutions:
- Adjust Watering: Ensure the soil is well-draining and only water when the top inch of soil is dry.
- Provide Adequate Light: Move your plant to a location with bright, indirect light.
- Check for Pests: Inspect for pests that might be causing damage to the leaves and treat accordingly.
7.2 Brown Tips
Brown tips on the leaves can be caused by several factors that affect the plant’s overall health:
-
Causes:
- Over-fertilizing: Excessive nutrients can lead to leaf burn, causing the tips to turn brown.
- Dry Air: Peace lilies prefer humid environments, and low humidity can cause brown tips.
- Inconsistent Watering: Not watering the plant consistently can result in dehydration, leading to browning at the leaf tips.
-
Solutions:
- Trim the Brown Tips: Use clean, sharp scissors to cut away the brown edges to improve the plant’s appearance.
- Adjust Watering/Fertilizing: Ensure you water regularly and avoid over-fertilizing, especially during the growing season.
- Increase Humidity: Place a humidifier nearby or mist the leaves occasionally to maintain adequate humidity levels.
7.3 Drooping Leaves
Drooping leaves are another sign that your peace lily is stressed. Here’s what to do:
-
Causes:
- Under-watering: If the plant has been without water for too long, its leaves will droop.
- Low Humidity: Peace lilies thrive in humid environments, and dry air can cause drooping leaves.
-
Solutions:
- Hydrate the Plant: Water the plant thoroughly, ensuring that the soil is moist but not soggy.
- Increase Humidity: Use a humidifier or mist the leaves regularly to maintain moisture in the air.
7.4 Pests and Diseases
Pests and diseases can also affect the health of your peace lily. Here are the common culprits and how to deal with them:
-
Common Pests:
- Spider Mites: Small, reddish pests that cause a speckled pattern on leaves.
- Aphids: Tiny insects that cluster on new growth and may cause yellowing and wilting.
-
Prevention and Treatment:
- Neem Oil: Apply neem oil to the plant to deter pests naturally.
- Insecticidal Soap: Use insecticidal soap to treat infestations and clean the plant’s leaves regularly.

8. Repotting Your Peace Lily
Repotting your peace lily is an essential part of its care routine, ensuring the plant has enough space to grow and thrive. This section covers when and how to repot your peace lily to keep it healthy.
8.1 When to Repot
Knowing when to repot your peace lily is crucial to its growth. Below are signs that indicate it's time to repot:
- Roots Emerging from Drainage Holes: If you notice roots poking out of the drainage holes, this means the plant is root-bound and needs more space.
- Stagnant Growth: If your peace lily has stopped growing or its growth has slowed down, it might be a sign that it has outgrown its current pot.
- Soil Drying Too Quickly: If the soil dries out too quickly after watering, the plant may need a larger pot to retain moisture and provide room for roots to expand.
- Ideal Time to Repot: The best time to repot your peace lily is in spring when the plant is actively growing. Avoid repotting during the winter months as this can stress the plant.
8.2 Step-by-Step Guide for Repotting
Follow these steps to repot your peace lily and give it the best chance for healthy growth:
- Prepare the New Pot: Choose a pot that is 1-2 inches larger in diameter than the current pot. Ensure it has drainage holes to prevent waterlogging.
- Prepare Fresh Potting Mix: Use a well-draining potting mix that is slightly acidic to neutral in pH. A mix designed for houseplants or one that contains peat and perlite works well.
- Remove the Plant: Gently remove the peace lily from its current pot. You may need to tap the sides of the pot or gently squeeze it to loosen the plant from the edges.
- Inspect the Roots: Examine the roots for any signs of rot or damage. Trim away any dead or unhealthy roots with sterilized scissors or pruning shears.
- Place the Plant in the New Pot: Position the peace lily in the center of the new pot. Fill the sides with fresh potting mix, making sure the plant sits at the same depth as before.
- Water and Settle the Plant: Water the plant thoroughly to help the soil settle and eliminate air pockets around the roots. Let the water drain out completely.
- Post-Repotting Care: Place the repotted peace lily in a location with bright, indirect light. Avoid direct sunlight for a few days while the plant adjusts to its new home.
9. Propagating Peace Lilies
Propagating peace lilies allows you to grow new plants from your existing one. This section covers two methods of propagation: division and cuttings, both of which are simple and effective.
9.1 Propagation by Division
Propagation by division is an excellent way to create new peace lily plants. This method involves dividing the plant into smaller sections, each with its own roots and foliage. Here’s how to do it:
- Choose the Right Time: The best time to divide a peace lily is during repotting, usually in the spring when the plant is actively growing.
- Remove the Plant from the Pot: Gently take the peace lily out of its pot and shake off the excess soil to expose the roots.
- Divide the Plant: Carefully separate the plant into smaller sections using your hands or a clean, sterilized knife. Each division should have at least one healthy root system and a portion of foliage.
- Pot the Divisions: Plant each division in its own pot with fresh, well-draining potting mix. Ensure the roots are fully covered and the plant sits at the same depth as it was in the original pot.
- Water and Care: Water each newly divided plant thoroughly and place them in a location with bright, indirect light. Keep the soil moist but not soggy to encourage healthy growth.
9.2 Propagation from Cuttings
Another way to propagate peace lilies is through cuttings. This method is faster but requires patience. Here's how to do it:
- Choose the Cutting: Select a healthy leaf or stem with a portion of the main stem attached. Use sterilized scissors to make the cut.
- Water Propagation: Place the cutting in a jar or glass of water, ensuring the base of the stem is submerged but the leaf is above the waterline. Change the water regularly to keep it fresh.
- Soil Propagation: Alternatively, you can plant the cutting directly into moist, well-draining soil. Cover it with a plastic bag or place it in a humid environment to promote rooting.
- Wait for Roots to Develop: After a few weeks, the cutting will develop roots. Once roots have formed, transfer the cutting to a pot with fresh potting mix.

10. Peace Lily Varieties
Peace lilies come in a variety of types, each with unique characteristics such as leaf color, size, and bloom shape. Here’s a brief overview of some popular varieties:
- 'Mauna Loa': Known for its large, glossy green leaves and striking white blooms. This variety is one of the most popular and commonly found in households.
- 'Domino': This variety has distinctive variegated leaves with white markings, creating a more ornamental appearance. The blooms are slightly smaller but equally beautiful.
- 'Sensation': The 'Sensation' variety is known for its tall, upright leaves and large white spathes. It’s one of the largest varieties and can grow up to 6 feet in height.
- 'Smallissima': A smaller variety with compact growth, making it ideal for smaller spaces. It features deep green foliage and smaller, delicate blooms.
- 'Sweet Chico': This variety has softer, more rounded leaves and is often considered one of the best for indoor spaces due to its compact size and attractive blooms.
11. FAQ - Frequently Asked Questions
Here are answers to some common questions about caring for peace lilies:
-
How often should I water my peace lily?
Peace lilies typically need water every 1-2 weeks, but it depends on your indoor conditions. Water the plant when the top inch of soil feels dry to the touch. During warmer months, you may need to water more frequently.
-
Why are my peace lily’s leaves turning yellow?
Yellowing leaves can be caused by over-watering, poor drainage, or nutrient deficiencies. Ensure the plant is not sitting in water, and adjust the watering schedule if necessary. Also, check if it’s getting the right amount of light.
-
Can peace lilies survive in low light?
Yes, peace lilies are tolerant of low light but prefer bright, indirect light. In low-light conditions, they may grow more slowly, and the blooms may not be as vibrant. Avoid placing them in direct sunlight as this can scorch their leaves.
-
What’s the best fertilizer for peace lilies?
A balanced, water-soluble fertilizer (such as 10-10-10) works best for peace lilies. You can also opt for organic options like fish emulsion or compost. Fertilize during the growing season (spring and summer), but avoid over-fertilizing.
-
How can I tell if my peace lily is over-watered?
Signs of over-watering include yellowing leaves, wilting, and a mushy base. If the plant is consistently soggy, it can lead to root rot. Ensure the pot has drainage holes and allow the soil to dry out between waterings.
Additional Resources
How to Grow Cilantro from Seeds Faster Than You Thought Possible! – XRoci
10 Best Plants for Kitchen Windows That Will Transform Your Space Inst – XRoci
Squash Gardening Made Easy: How to Grow Squash from Seeds in Just 4 Si – XRoci


